Eto.Formsでリストボックス
設定ダイアログは、やや複雑でしたが、まだ主要なGUIコントロールがあるので、ある程度おさえておきます。
今回はリストボックス(Eto.Forms.ListBoxクラス)を使います。
このクラスは比較的素朴で、表示している中身(Itemsプロパティ)や選択されている項目(SelectedValueプロパティ)が露出しているため、それらを直接操作することもできますが、ここではデータバインドで扱います。
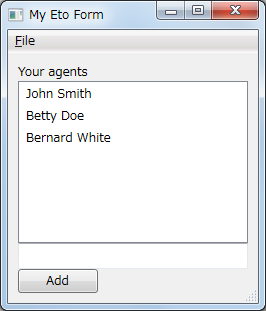
できあがりは次のような感じで、リストボックスと、リストへの追加用1行テキスト、追加ボタンを配置します。

まずは普通にプロジェクトを作成します。設定はPCL/Code。
using System.Collections.ObjectModel;
using Eto.Forms;
using Eto.Drawing;

namespace EtoSample_listbox
{
    public class MainForm : Form
    {
        ObservableCollection<MyModel> ModelData = new ObservableCollection<MyModel>
        {
            new MyModel { Name = "John Smith", Age = 38, },
            new MyModel { Name = "Betty Doe", Age = 33, },
            new MyModel { Name = "Bernard White", Age = 36, },
        };

        public MainForm()
        {
            Title = "My Eto Form";
            ClientSize = new Size(250, 250);

            var list = new ListBox { DataStore = ModelData, };
            list.ItemTextBinding = Binding.Property((MyModel m) => m.Name);
            //list.ItemTextBinding = new PropertyBinding<string>("Name", false);

            var text = new TextBox { };
            var button = new Button { Text = "Add" };
            button.Click += (s, e) => {
                ModelData.Add(new MyModel {
                    Name = text.Text, Age = 17
                });
            };

            Content = new StackLayout
            {
                Padding = 10,
                Items =
                {
                    "Your agents",
                    new StackLayoutItem {
                        Control = list,
                        Expand = true,
                        HorizontalAlignment = HorizontalAlignment.Stretch },
                    new StackLayoutItem {
                        Control = text,
                        HorizontalAlignment = HorizontalAlignment.Stretch },
                    button,
                }
            };

            var quitCommand = new Command { MenuText = "Quit" };
            quitCommand.Executed += (sender, e) => {
                Application.Instance.Quit();
            };

            Menu = new MenuBar
            {
                Items =
                {
                    new ButtonMenuItem { Text = "&File", Items = { } },
                },
                QuitItem = quitCommand,
            };
        }
    }

    public class MyModel
    {
        public string Name { get; set; }
        public int Age { get; set; }

        public override string ToString()
        {
            return $"{Name}, {Age}";
        }
    }
}
モデル(M)
末尾にあるのが、モデルクラス(MyModelクラス)です。名前と年齢をもったシンプルなPOCOです。
ビューモデル(VM)
(モデルデータ兼)ビューモデルは、コード先頭のフィールドObservableCollection<MyModel> ModelDataです。
System.Collections.ObjectModel.ObservableCollectionはデータの変更を通知するコレクションなので、これでリストを生成すれば、VMのできあがりです。
VとVMの結合(1)
ListBoxの生成時に、DataStoreへの代入として行っています。
ListBoxにはDataContextプロパティもありますが、これは「ListBoxの背景色」など、ListBox全体に関するものなので、中身についてはDataStoreで設定します。
さて、実はDataStoreへの代入だけでバインド自体はできています。
つまり、直後の2行はなくても動作します。
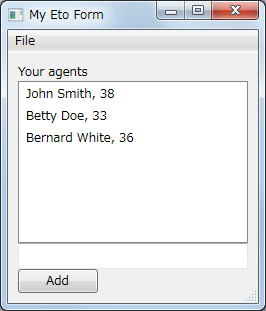
ただし、その場合、ListBoxにはModelDataの各インスタンスのToString()の結果が表示されます。
VとVMの結合(2)
表示する項目を選びたい場合は、もう少しコードが必要です。 それがDataStore代入後の2行です。
次の2行(片方はコメント)は、どちらでもバインド可能です。
list.ItemTextBinding = Binding.Property((MyModel m) => m.Name);
list.ItemTextBinding = new PropertyBinding<string>("Name", false);
ただし、後者はプロパティを文字列で指定する分だけ間接的です。 色々な型を設定するのであれば、有効かもしれません。
実行
起動すると、最初に生成しているモデルデータから、Nameプロパティの一覧を表示します。

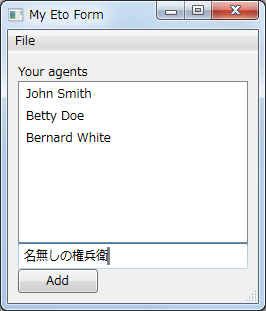
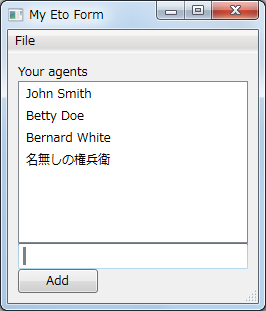
下の1行テキストに名前を入れて「Add」ボタンを押すと、ModelListに項目を追加し、データバインドによる連動でListBoxにも行が追加されます。


なお、ItemTextBindingを設定しないと、ListBoxの各行は、MyModel.ToString()の結果となります。
